
Best practice proposal presentation: part one - captions
Aug 01, 2025
By Kate Burrows, Managing Director, Tender Training College
Consistent high-quality responses
For people who are skilled at bid preparation or who have been tendering for a long time, there are certain elements or 'best-practice' standards that we automatically apply to our tender proposals.
I was reminded of some of these standards when I was training a customer recently – he is new to the bidding environment and was preparing his first tender (of 300 pages!).
Also, I am constantly amazed at the actual depth of what is required to deliver a high-quality submission and the discipline required to ensure a tender submission is consistent throughout.
Overall, our job is to ensure the evaluator can easily find and understand the information they are looking for, and a high-quality proposal helps to achieve these goals.
As part of this series, I am sharing some tricks of the trade to streamline the tender preparation process and to finesse your presentation. In this first post, we are looking at captions.
Overview of a caption
Captions are required for tables and figures in your tender response. Each table caption should be numbered consecutively, as well as each figure caption. I normally start each section of my response with new caption numbering.
Each caption should also have a short title to give the evaluator context. Think of the title as a brief description of what the table or figure contains or shows.
I expand on this later, but we also need to make sure we reference the table or figure in the proceeding text.
Insert a caption
It is best to have the table or figure already in the document before inserting the caption. After inserting an image, right click on it and then select “Wrap Text” and select the option to enable the image to be moved near the relevant text. In Figure 1, I selected “Wrap Text” and “Square”.
Then follow these steps in Word to insert a caption – the end result is shown in Figure 1:
1. Click on the figure/table so it is highlighted
2. On PC, click “Reference” and then “Insert Caption”. On Mac, click “Insert” tab and then “Caption”
3. Choose the "Label" option to choose Figure or Table
4. Add your descriptor after the label number
5. Decide if you want the caption above or below the text under "Position"
6. Choose preferred numbering format
7. Click "OK".
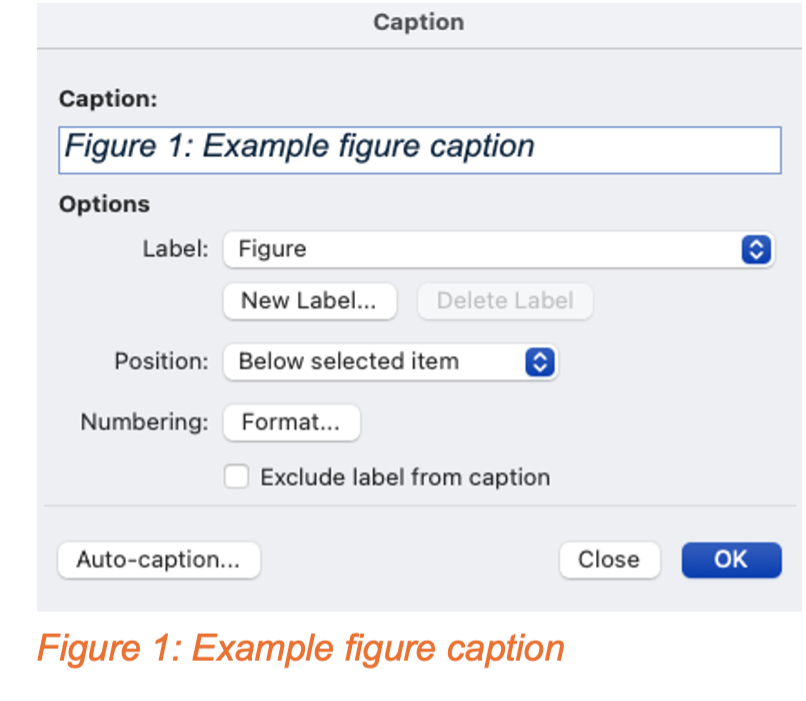
This automatically places a figure caption in a text box under my image as shown in the example above. You can move the caption text by clicking it to highlight the text box.
Format a caption
Figures and tables should be introduced in the text prior to them appearing to provide context to the reader. We do this by inserting a cross reference for each figure.
Follow these steps to format the caption:
1. Cross references can then be linked to the caption titles using the "Reference/Cross Reference” (PC) tab and “Insert/Cross reference” (Mac) in Word as shown in Figure 2. When you click on the Figure 2 reference in the text, it will take you to the numbered figure.
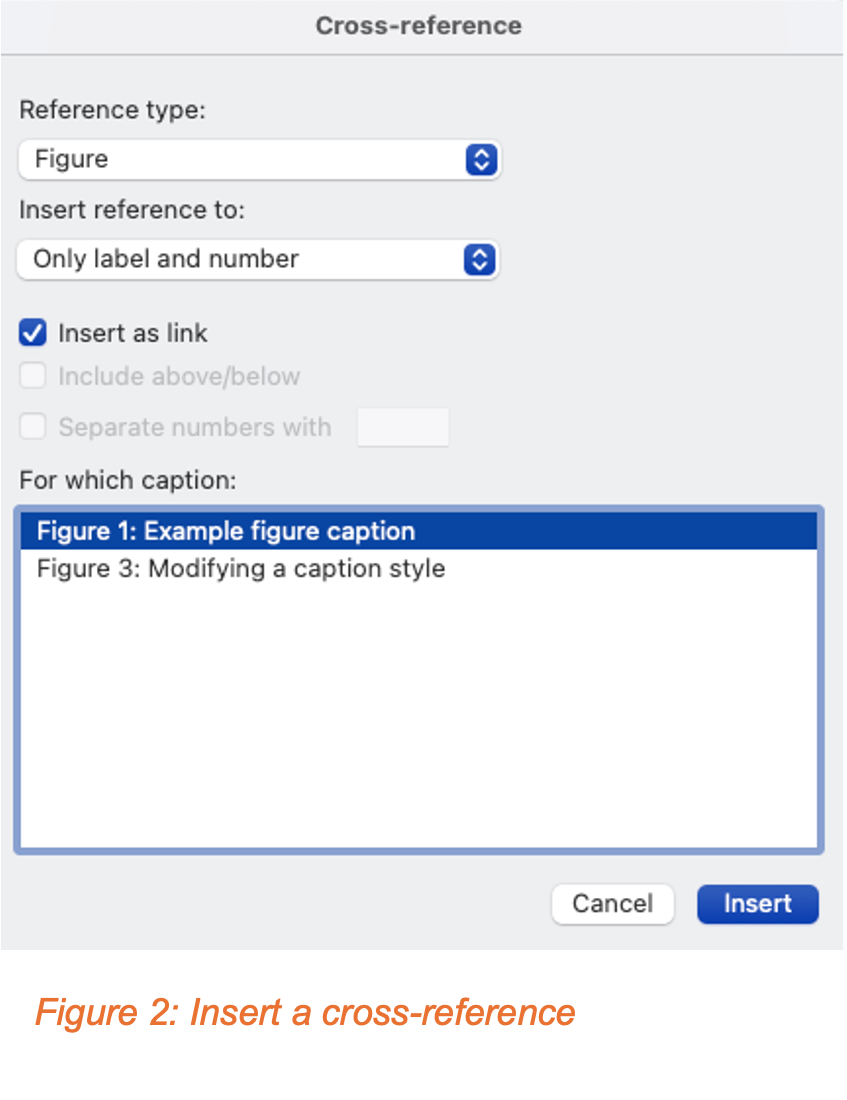
This also means if you add another figure after Figure 2 and apply the same process, it will automatically update the numbering in the caption and cross reference. If it doesn’t, right click on the figure number in the caption and click “Update Field”.
2. Make sure images and graphs are inserted at a size and resolution so they are readable.
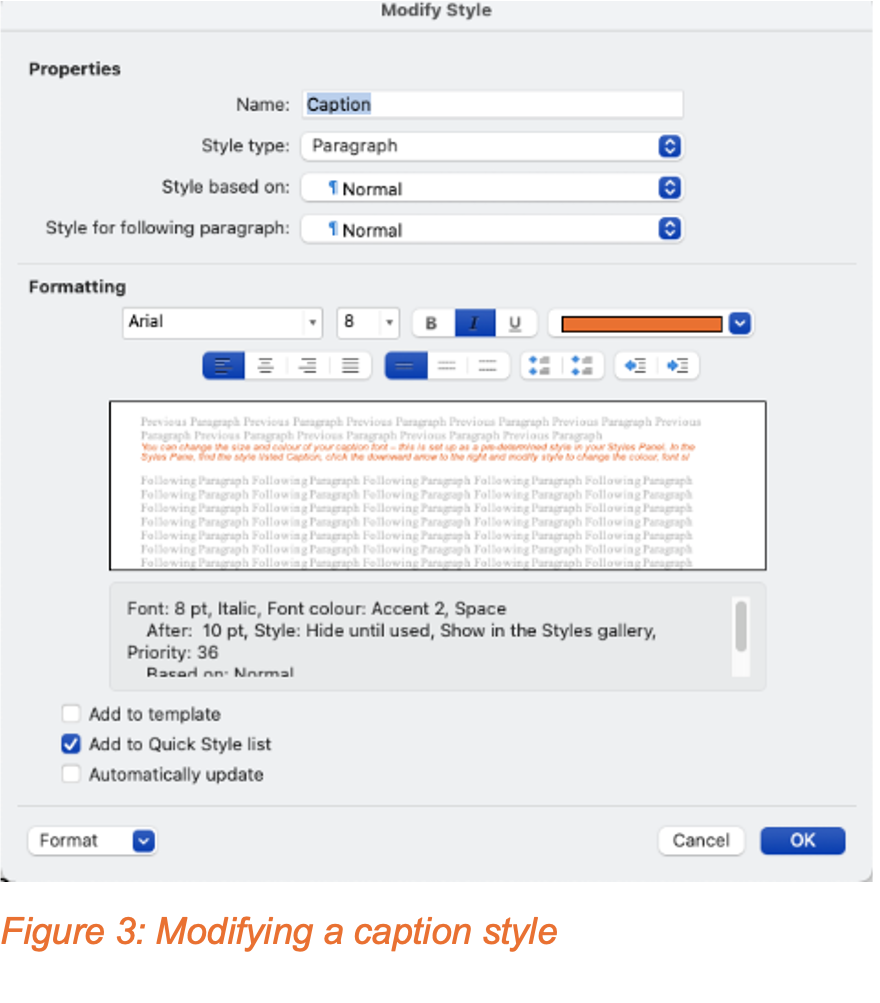
3. You can change the size and colour of your caption font – this is set up as a pre-determined style in your Styles Panel. In the Styles Panel, find the style listed “Caption”, click the downward arrow to the right (Mac) or right click on PC to select “Modify Style”. This will allow you to change the colour, font size and paragraph spacing accordingly, as shown in Figure 3.
If you have any questions regarding captions, please drop me a note at kate@tendertrainingcollege.com.au
